I am quite keen on making the most of both the time I spend spinning and the fibre I use, to that end I spin most of my yarns with a project in mind.
Hand dyed spinning fibre is a big temptation, but so many spinners are disappointed with how their yarns knit up. Due to; muddied colours, barber pole effects, length of colour repeats, strong striping, dye lot changes, etc. The list is endless.
So I thought I would write some blog posts addressing these issues.
The first issue I thought I would address is the effect on the length of colour stripes when the width of the knitting fabric changes.
Eg. You spin some beautiful yarn from hand dyed top or graduated batts, and proceed to knit a triangular shawl which starts with a few stitches per row and increases to several hundred per row.
The closer you get to the edge the thinner the bands of colour become, to the extent that the edge doesn’t even have stripes.
The effect may be pleasing, or it might not.
To keep the bands of colour more equal make a simple change to the way you prepare your fibre before you start spinning.
Here is an example:
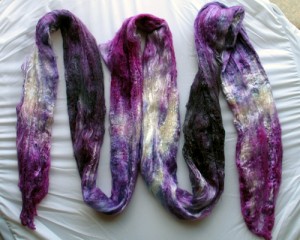
I have 100grams of hand painted top which has repeats of colour along its length and 100grams of hand dyed top which has very little variation in colour.
I plan to spin both lots of fibre and ply them together to form a 2ply.
I then want to use it to knit a large circular shawl, If I work from the top as I received it, without any splitting the resulting shawl with have a large circular of colour in the middle with the bands of colour getting smaller and smaller towards the edge and even mottled at the far edge.
If I want the bands of colour to have a similar width across the diameter of shawl I can strategicly divide the fibre before I start spinning.
For this example I will just divide the fibre for 1 ply and leave the second more solid fibre as is.

I split the fibre in half length ways as my fibre is a silk brick which is much wider than regular top, so for regular top skip this step or your fibre may be too thin to split further.


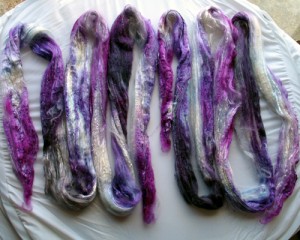
Next comes the strategic dividing of fibre. I broke the top into 5 fairly equal pieces, you can do this based on the colour repeats in your fibre for best results.
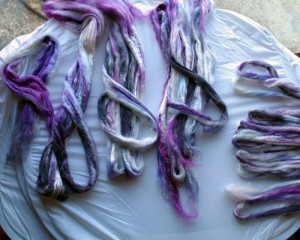
The first piece is not split at all (1). The next piece is split in half lengthways to make 2 thinner strips (1/2). The next piece is split into 3 lengthwise for even thinner strips (1/3). The next piece is split into 4 lengthwise (1/4). The last piece is split into 6 lengthwise (1/6) (I can’t manage to get 5 equal strips so I do 6, I do this by spliting in half, then spliting each into 3.) You can see in the photo the piles of fibre getting thinner from left to right.


I then crochet chain the strips of top in order so that they don’t get mixed up before spinning, if you want the colours to follow in sequence make sure you take note of the ‘start end’ and the ‘end end’.
You can see in this picture that the chain goes from fat, to thin and then thinner, the thinnest I rolled into a ball as it would be messy to chain.

When you have spun and plied your yarn you want to use the end with the short colour changes at the small part of your shawl (centre for round shawls) and the slow colour change end will be for the longer edge of your shawl.
For this fibre I will straight 2 ply with the 2nd solid ply, but you could navajo ply for great colour alignment. Or if you are really confident in your dividing skills divide in the same way for both plies for a matched 2ply.
I’ll update this post with a photo of the shawl when its finished.

How informative. Looking forward to more on how coloured fluff spins up. There are just so many options for how to approach it that it’s difficult to know where to start.
very useful post, Bex, thank you
Thank you. I’d been thinking along these lines in my head but it was all very woolly and now you’ve made it clear! Brilliant and I can’t wait to see the shawl 🙂