Flicking Shetland

I’ve had a 3week long battle with a dental abscess and the dentist. I won’t bore you with all the details, but today we got to;
Dentist “I didn’t know you were in pain last time I saw you.”
Me “I told you I was. And the receptionist.”
Dentist “you didn’t tell me or I would have prescribed some antibiotics.”
Me “The receptionist told me there was no way for me to get an appointment any earlier (than 2weeks), that I’d have to wait, even though I told her I was in pain.”
Dentist “You could have come back sooner.”
Me “As I said before the receptionist said the earliest I could be seen was …”
Me “The only reason I called today was because my GP said you HAD to see me today. So I thought I’d try.”

So the result so far? Another course of antibiotics, stronger ones for anaerobic bacteria this time, hopefully they will work and we can get on with treatment.
The toothache is bad enough but I’ve been getting waves of the most horrific pain all up that side of my face, jaw and neck. These waves of pain leave me unable to do anything but lay there shaking and sobbing until they pass, usually about half an hour later. There doesn’t seem to be a trigger and the painkillers make no difference. I just hope the antibiotics work quick!

So as you can imagine I haven’t done much knitting in the last 2weeks and especially not the last few days.
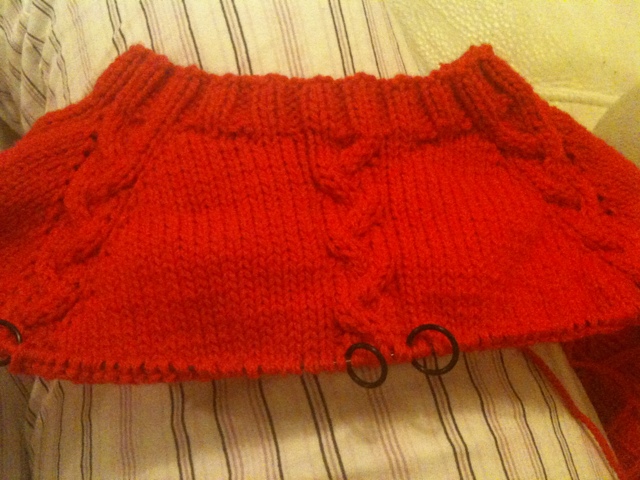
Between waves of pain I’ve managed to knit most of the raglan for a jumper for my daughter.
20120320-003440.jpg
The wool is beautiful Superfine Australian 8ply, maximum of 18microns. It doest say it’s merino, but it must be at that kind of fineness. It’s superwash and bright red of course so perfect for my daughter. It was a very kind gift from an Australian Ravelry friend.

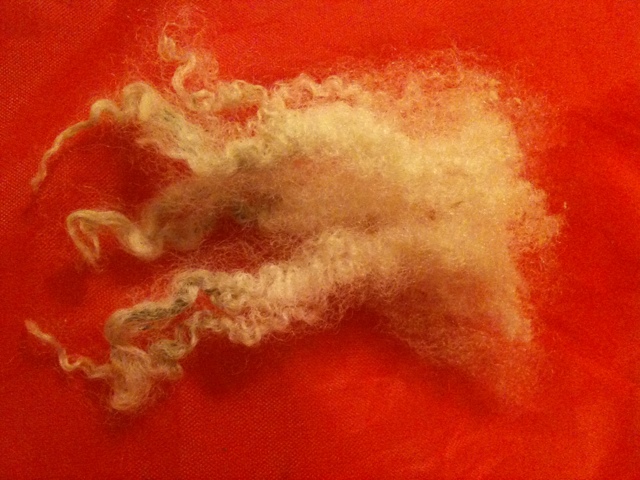
Last night I thought maybe I could work through the pain by flicking some beautiful Shetland locks. I got some done before the pain overwhelmed me again.
The fleece is a White Shetland Ewe fleece I bought at Wonderwool last year. It’s beautiful; fine wool with a good crimp, no break.
Hand washed by me.

20120320-004346.jpg

20120320-004411.jpg

A box of flicked locks.

20120320-004444.jpg

This is probably the simplest, easiest and cheapest method of processing fleece except for spinning directly from the unwashed fleece.
All you need a small flicker, you can buy one from your spinning supplier, but you don’t need to. A dog slicker from your local pet shop or discount store will work just as well. I paid about £2.50 for mine from Wilkinsons.
I’ll try and post a photo later so you know what you are looking for.
You’ll also want a piece of leather or thick plastic to lay over your lap to flick on, otherwise you’ll soon have a whole in your trousers.

As a final thought, I’ll show you the pretty card my daughter made for me. Wow her feet have got big since she was that tiny baby I bought home.

20120320-005739.jpg

Leather Spinning Journal

A new year, a new journal. A hand bound leather spinning journal.
Each leaf has a detail section for spinning project, holes for attaching samples and a notes section on the reverse.

20120107-065501.jpg

Hand sewn using a technique that allows the book to lay flat when opened.

20120107-065751.jpg

With a firm real leather cover that will protect and really last.

20120107-065930.jpg

I made a mini spinning journal last year but am really loving this A6 size for all the technical details.

I’m in the process of making some more journals in a variety of leathers with different ribbon ties. I’m also making some wrap around style journals which are beautiful too.

If you are interested in buying one please leave a note in the comments, email me or send me a message on twitter @ninjabex
Prices will vary depending on the size, style and number of pages, From £15.

Happy New Year Spinners!

Added some more photos for you. Will post good pics when the light allows…

20120110-025315.jpg

Spinning for a project – Use of colour

I am quite keen on making the most of both the time I spend spinning and the fibre I use, to that end I spin most of my yarns with a project in mind.
Hand dyed spinning fibre is a big temptation, but so many spinners are disappointed with how their yarns knit up. Due to; muddied colours, barber pole effects, length of colour repeats, strong striping, dye lot changes, etc. The list is endless.
So I thought I would write some blog posts addressing these issues.

The first issue I thought I would address is the effect on the length of colour stripes when the width of the knitting fabric changes.
Eg. You spin some beautiful yarn from hand dyed top or graduated batts, and proceed to knit a triangular shawl which starts with a few stitches per row and increases to several hundred per row.
The closer you get to the edge the thinner the bands of colour become, to the extent that the edge doesn’t even have stripes.
The effect may be pleasing, or it might not.

To keep the bands of colour more equal make a simple change to the way you prepare your fibre before you start spinning.

Here is an example:
I have 100grams of hand painted top which has repeats of colour along its length and 100grams of hand dyed top which has very little variation in colour.
I plan to spin both lots of fibre and ply them together to form a 2ply.
I then want to use it to knit a large circular shawl, If I work from the top as I received it, without any splitting the resulting shawl with have a large circular of colour in the middle with the bands of colour getting smaller and smaller towards the edge and even mottled at the far edge.
If I want the bands of colour to have a similar width across the diameter of shawl I can strategicly divide the fibre before I start spinning.
For this example I will just divide the fibre for 1 ply and leave the second more solid fibre as is.

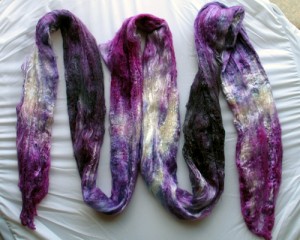
Undivided Top
fig1: Undivided Top

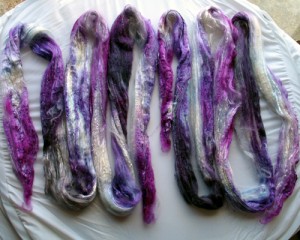
I split the fibre in half length ways as my fibre is a silk brick which is much wider than regular top, so for regular top skip this step or your fibre may be too thin to split further.

Split in half lengthwise
fig2: Split in half lengthwise
fig2 diagram
fig2 diagram

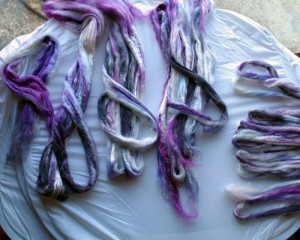
Next comes the strategic dividing of fibre. I broke the top into 5 fairly equal pieces, you can do this based on the colour repeats in your fibre for best results.
The first piece is not split at all (1). The next piece is split in half lengthways to make 2 thinner strips (1/2). The next piece is split into 3 lengthwise for even thinner strips (1/3). The next piece is split into 4 lengthwise (1/4). The last piece is split into 6 lengthwise (1/6) (I can’t manage to get 5 equal strips so I do 6, I do this by spliting in half, then spliting each into 3.) You can see in the photo the piles of fibre getting thinner from left to right.

fig3: Strategic dividing

fig3 diagram
fig3 diagram

I then crochet chain the strips of top in order so that they don’t get mixed up before spinning, if you want the colours to follow in sequence make sure you take note of the ‘start end’ and the ‘end end’.
You can see in this picture that the chain goes from fat, to thin and then thinner, the thinnest I rolled into a ball as it would be messy to chain.

fig4: final chained top

When you have spun and plied your yarn you want to use the end with the short colour changes at the small part of your shawl (centre for round shawls) and the slow colour change end will be for the longer edge of your shawl.
For this fibre I will straight 2 ply with the 2nd solid ply, but you could navajo ply for great colour alignment. Or if you are really confident in your dividing skills divide in the same way for both plies for a matched 2ply.
I’ll update this post with a photo of the shawl when its finished.

Spinning Journal

I have been keeping a spinning journal for a while, and I consider selling these hand bound spinning journals in my shop, but that’s now unlikely to happen, as I don’t think their potential sale price covers my time to make them.

So I’m going to write a tutorial to share what I have learnt in the process of making mine, and what I finally came up with.

To start with, here is the pdf of my page template. Its an A4 template, the pages are folded in half for hand binding, giving an A5 journal.

Spinning Journal Template

Fractal Spinning

I’ve been playing with fractal spinning the last few days.
This is a draft tutorial and needs more information and images.
What is fractal spinning?
Well it is method of spinning, it works best with tops which have been painted with stripes (there are alternatives, but I will ignore them here for simplicity).
The principal is to create a yarn where the plies have different lengths of colour repeat.  This is achieved by dividing the top lengthways.
This method shows how to create a 2ply yarn, though the theory can be applied for 3plies.
It works best with tops that have a regular colour repeat, 3 colours works well.  This example has only 2 colours.
Starting off with 1 length of continuous top (this  is Superwash Merino from ColourflDesigns.com), we want to spin all the tops in the same direction, so we need to make a note of the end.  I will be spinning from the end with the longer yellow stripe (top of  photo).
Fractal Step 1
Fractal Step 1 - Undivided Top

Split the top along its length being carefuly to keep both peices equally, providing you with 2 lengths of top that are half the width of the original.

You now have 2 lengths of top that are thinner, remember the end to spin from (bottom left of both peices in this picture).

Fractal Step 2
Fractal Step 2 - First Divide

1 of these will become the first ply for your yarn.  The 2nd needs to be split again length ways, making 2 equal thinner strips.  Remember which end you are spinning from.  In the image below: Left; Top for first ply (spinning end is bottom left),  Right; Top for second ply, 2 thinner lengths (spinning end is bottom length of both peices).

Fractal Step 3
Fractal Step 3 - Final Divide

You may want to roll these into a ball, or pre draft by attenuating them if you wish, but this may cause the colours to blend together, disrupting the striping.

When you spin each of the plies, the first ply will have long colour repeats, (in the image above the 1st ply will have 9  long colours repeats of yellow, purple), the 2nd ply will have shorter colour repeats (in the image above the 2nd ply will have 18 shorter colour repeats of yellow, purple).

Making sure you spin the tops from the right end will meake sure you get matching colour repeats aong the length, and when you ply you should ply from the same end of each single.

The effect will be a yarn with slow colour changes over laid with faster colour changes, making a really interesting colour blend effect.  Where both plies are the same colour you will get a solid section, but other sections will be blended.  If you are using more than 1 length of top for a larger garment follow the same steps and identify the same starting end if possible (this is easier when 3 or more colours are present).

I will post more pictures of the finished yarn and a knitted item when its finished.  It works well for socks!

Dyeing day

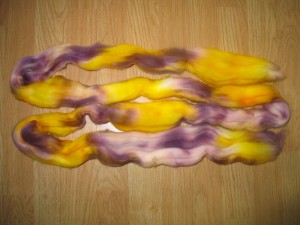
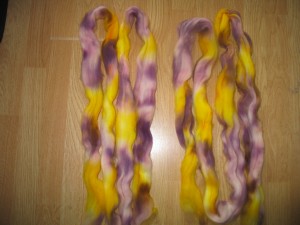
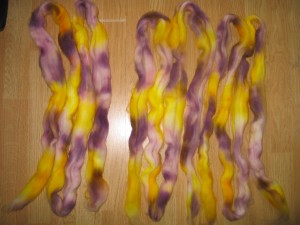
I did some dyeing today, here are some pictures. I’m going to use the Pansy colourway to try some fractal spinning.

IMG_2534
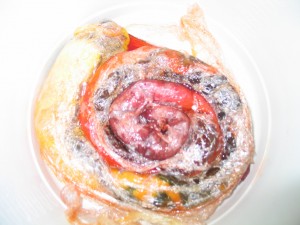
Superwash Merino, still wrapped in clingfilm sausage after dying in Moss colours.
Spiral dying
Shetland and BFL humbug next to each, spiral dyed Red -> Yellow, still wrapped in clingfilm.
Moss + Spiral Fire
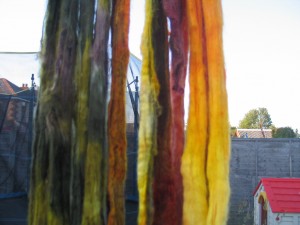
The moss and Spiral dyed fibre hanging up to dye.
Pansy Superwash Merino
Superwash Merino in Pansy colourway. I ran out of blue dye (and thus Purple) so the second lot is paler purple.

For those of you who may be interested this is where I do my dyeing.

Workspace

Workspace

Sheep Yoke Cardi – Keep going

Well I had hoped to post a lovely picture of the yoke which I have finished and am now working on the main colour. But my faithful camera of 8 or 9 yrs has given up, every memory card I put in it just says card error. So a new camera is on the cards, wouldn’t have minded if I had wanted a new one, but the old one worked perfectly and despite being dated I really liked it.

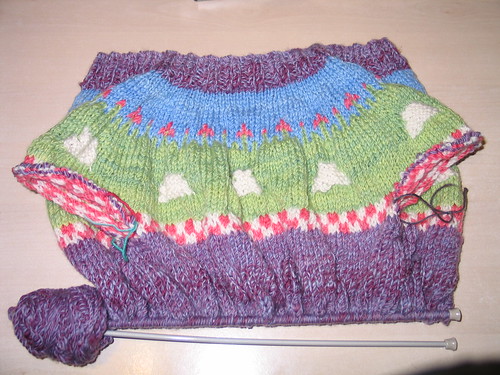
Here is the picture of the work so far.  The sheep need faces and legs! You can see the stitches held on spare yarn at each side.

Sheep Yoke

I have now started on the sleeves, even though I haven’t finished the body, as I haven’t decided if I want to add any colour work to the  bottom of the body, so I thought I would do the sleeves then assess how much yarn I have left when they are done.

Sleeves: Using main colour Pick up 3 sts from Cast on in arm pit and knit 44sts on holding yarn.

Work 1.5inches in Main colour, decrease 2 st at sleeve ‘seam’, and every 3inches, until 41sts remain.

Work straight until sleeve measures 8.5inches from arm pit.

Work colour and ribbing, then cast off.

Repeat for second sleeve.

I have got back to knitting some squares for my sock yarn blanket this weeek too, so its growing again, I think it might be ready for next winter.  The more I do of it, the more I love it and the more I want to give it to Emily, I feel its something she could grow up with and keep for the rest of her life.  But I still really want it for myself, as it fels so nice over my lap, light and warm.

Sheep Yoke Cardi – Step 8

Yay dry wool!

The pictures I took mid process seem to have disapeared off my mem card (that’s what you get for using a camera with memory card thats 8yrs old and has probably exceeded its max write cycles!).

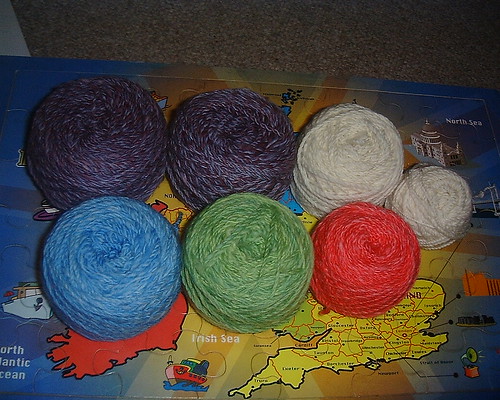
So here are the pictures of the finished yarn cakes.

Sheep Yoke Cardi Yarn Cakes

In the next picture hopefully you can see the 2tone 2ply for the main colour, and the variagation in the grass green and sky blue.

Sheep Yoke Cardi Yarn Cakes Detail

At last I can cast on!

Sheep Yoke Cadi – Steps 5-7

I died all the fibre earlier in the week.

I spun the singles, have of each colour first, then the second colour, to help improve consistency. Then plied and skeined it all. I have washed and finished it all, but now have to wait for it to dry before I can wind it into balls.

I haven’t measured the yardage so fingers crossed.

I choose lilac solid and mauve/purple with some variation, for the main colour, I have made a 2 tone 2 ply yarn with it, and am really pleased with how its come out. As long as there is enough, as I doubt I would be able to make a good dye repeat of this.

In other news I have been preparing some batts for the shop, as well as  some orifice hooks and some stitch/row markers.  I had planned to do an update this afternoon, but have run out of steam, so it will either be mid week, or next weekend.  Sorry.

As a spoiler…

There are some Sock Batts Merino/Nylon in colourway ‘Fire’, Ladybug orifice hooks, and simple stitch/row markers in various colours.

Sheep Yoke Cardi Step 2-4

I knitted a small swatch with the 2ply sample I had spun and washed. I didn”t bother to knit a sample with the 3ply as I preferred the 2ply and think it will offer a lighter drape in the finished fabric, also will require less spun singles.
I measured the wpi of the finished sample at about 11wpi, which is Double Knitting (US Light Worsted). This is great news as thats what I was aiming for.
On 4mm the gauge is …sts x …rows per 4inches.

My sample only weighed 4grams and gave 8meters, I didn’t think this was a large enough sample to use to calculate yardage per gram. But using it as a guide (2meters/gram) I spun 50grams of the undyed fibre, which was 105meters.  2.1meters/gram. (2.3yrds/gram)

I haven’t rewritten the pattern as I tend to work the pattern out as I go, but I can still estimate the yardage based on the yardage for the original sizing and the final measures of the new garment.

I’m going to work the pattern to fit 3-4yrs.
Chest: 28inches (71cm)
Length: 15inches (38cm)
Sleeve: 10inches (26cm) x 8inches

I could just make a generous guess about how much bigger this is than the original size, however a bit of simple maths will give me a pretty realistic value to use to calculate yardage.  (28×15 + 10×8)x2 = 1000. Technically this is the number of square inches of knitted fabric (it doesn’t take into account the fact the top is narrower than the bottom). For the original size : (22×14 + 7×8)x2 = 728.

To work out the new yardage : ( new size / original size ) x original yardage.  (1000/728) = 1.37

Main Colour (250 yards);
blue (90 yards);
green (90 yards);
cream (90 yards);
black (less than 20 yards);
pink (less than 60 yards).

New yardage / weight
Main Colour 343yrds / 150grams
blue 124yrds / 54grams
green 124yrs / 54grams
cream 124yrds / 54grams
black 26yrds / 11.5grams
pink 83yrds / 36grams.

Total weight = 360grams

So todays job is dying each of the colours.  Cream is undyed, and I’ve already spun 50grams of this.

I still haven’t decided on a colour for the main colour, I don’t want to do tan or any shade of brown, I’m thinking a pink or lilac or purple. Suggestions?

My Woolly Life

Yet again I am guilty of not updating,….  To busy spinning and knitting!

As a quick fill in, I got my Ladybug and have been spinning merily, hand blended Jacob and Agelina Batts for socks, Jacob and Angelina Batts in pink and lilac for a cardigan for Em, Laceweight (well almost) superwash BFL for a shawl, English wool Blend from Wildcraft for a bag in the style of Lizard ridge, my first long draw, thick and thin slub yarn for a necklace, …

Excitingly I got an Ashford drumcarder as a Valentine, Birthday, Xmas present (That’s xmas ’09!), I’m really pleased with it, I must wash some more fleece for blending.

But what I really wanted to post about is a pattern I’m planning on spinning for, its called Sheep Yoke Cardigan.  I will have to alter it for Em, as its sized for 9-12months, and recalculate the yardage.  I’m going to spin it from Superwash Merino Tops, being machine washable and soft is important for toddlers.

So plan of action;

1. Spin some sample singles and try 2ply and 3 ply to see what I think will be best.

2. Work gauge swatch.

3. Work out meters/gram of the sample I want to use.

4.  Rework the pattern in the size I need to make, and work out the yardage I need to spin.

5. Dye up the fibres.

6. Spin 1/2 (or 1/3) of each colour of fibre into singles, then spin the rest.  (To help with consistency.)

7. Ply.

8. Finish and wind into balls.

9. Start Knitting!

10. Happy sheepy Tot. 🙂

Dyeing

I am guilty of not updating, but its because I have been busy knitting lots, dyeing yarn for the shop and making a few buttons.  I will post some sneek previews of shop updates here as often as I can.

I found some beautiful yarn recent “Wendy Happy 4ply”, made from 75% Bamboo 25% Nylon.  It comes in a selection of beautiful striping colourways and is so so soft and smooth.  It costs aprox £5.49 for 100g.

A quick plug for a knitting friend who has just started her own blog.