How to adjust the flyer to reduce noise.
After a few months of using my Ladybug Spinning Wheel I found that it had started to make a ‘chattering’ noise as I spun. This tutorial describes an adjustment that can be made to reduce this noise. If you are in any doubt about something related to your Schacht wheel I recommend you contact your Schacht dealer, or Schacht directly for support.
There are many things that can cause your spinning wheel to make unexpected noises while spinning, this tutorial is for noise caused by the flyer moving backwards and forwards between the Maidens only.
Before trying this I suggest you remove your flyer, clean off all oil and grease, re oil as the Schacht Ladybug Manual instructs and try applying some white grease to reduce any noise caused by the bobbin.
Will this help me?
With your flyer assembly in place and the Front Maiden pushed back as far as it allows and the Front Maiden Knob tightened. Using your hand try to move the Flyer backwards and forwards.
If the flyer moves more than a few mms you may have a reduction in noise by adjusting the Front Maiden. If there is little or no movement this tutorial will probably not help and you should look for other causes of unexpected noise.
You will need:
- Schacht Ladybug Spinning wheel with Flyer
- Small Screw Driver
Have a look at the Ladybug Labeled Parts diagram on the Schacht Website to familiarise yourself with the part names.

Loosen the Front Maiden Knob and remove the Flyer. (fig1)

Unscrew the Front Maiden Knob Fully and remove it. Remove the Front Maiden from the Ladybug. (fig2)
Be careful not to loose the Front Maiden Knob and its white washer or the Front Maiden Glide Stop (fig2) or the Barrel Nut (fig5).

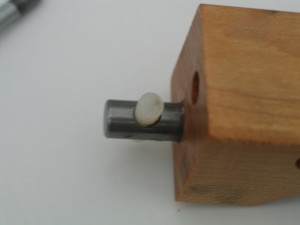
Locate the screw driver slot on the Front Maiden Glide Stop. (fig3)
This is the part which stops you being able to move the Front Maiden back too far. It is an important part of your spinning wheel, enabling you to glide the Front Maiden to the correct position every time without worrying it is too tight against the flyer.

Use the Screw Driver to turn the white threaded piece of Front Maiden Glide Stop. (fig4) You only need to turn the screw driver a small amount, approximately 1/4 turn.
If the Glide Stop is orientated the same way (as in fig4), with the screw slot towards the front of the wheel (this is the flat part of the Maiden, the part closest to the flyer is curved). Turning the screw anti clockwise will allow the Maiden to move further back reducing the amount of flyer movement. Only make tiny changes before trying the flyer again to check the movement.
After making a small adjustment place the Front Maiden and Flyer back on the wheel and check the movement in the Flyer while holding the Front Maiden as far back as the Glide Stop allows.
You can now replace the Front Maiden and the Front Maiden Knob to secure it. Ensure that you fit the Front Maiden facing the right way (as in fig1). When the Front Maiden is slid back as far as the Glide Stop allows the flyer should only move forwards and backwards the smallest amount.
However you do NOT want the Glide position of the Front Maiden too far back otherwise it will cause too much friction on the flyer, making treadling harder and may cause unnecessary wear. As well as making it harder to get the Front Maiden in the correct position. If it is too tight, remove the Maiden and re-adjust the Glide Stop (clockwise to give the flyer a little more space).

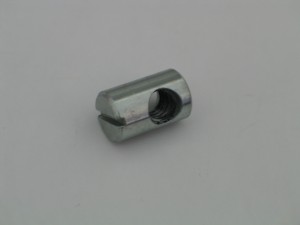
While doing this you may find a metal component falls out (Barrel Nut) (fig5). This nut goes inside the Front Maiden and the Front Maiden Knob is secured into it.

If the Barrel Nut falls out, or you have difficulty screwing the Front Maiden Knob back in, Push the Barrel Nut into the hole in the side of the Front Maiden (fig6). You may need to use a Screw Driver to align the Nut with the slot upright and in the centre of the Maiden, to enable the Front Maiden Knob to screw in.

If the Front Maiden Glide Stop falls out it can be held in place with a small amount of white grease. Some spinners have reported finding this part has fallen out of their wheel during changes in temperature etc, if this happens slot it back in (as in fig4) and hold with white grease if necessary. There is some information about this on the Schacht Website here.
I hope you find this information useful, but if you are in any doubt I recommend you contact local Schacht dealer or Schacht for support.
