Clearing bobbins

I’m working on a new design at the moment, so I don’t have a lot of knitting to share.  So that’s a little tease and here are some finished yarns from clearing off my bobbins ready for Spinzilla.

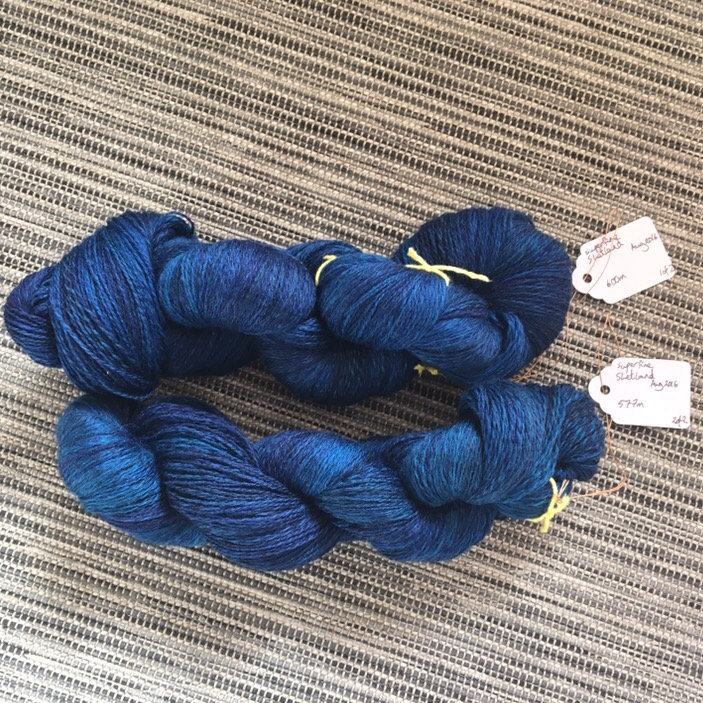
1177m of 2plied super fine Shetland. I haven’t washed it yet but I expect it to be heavy lace weight/light fingering weight. Love the colour of this.

200g of Merino / Silk blend top became 800m of fingering weight yarn. I love 3plied yarn, so I spun roughly 66g onto each of 3bobbins and made this great 3ply. I N-plied the remnants.

I had some tiny sample bits on a few bobbins so I plied those off to go in my box of oddments. All N-plied, some dyed mulberry silk, undyed mulberry silk and cotton.

The result… 

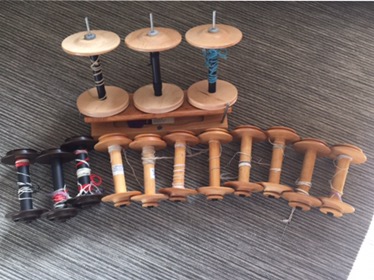
… a big pile of bobbins! I have some many Schacht bobbins as each wheel comes with 3 or 4 bobbins and I have 3 Schacht wheels that take these bobbins. The huge bobbins are the Hansen Woolee Winder bobbins. My Schacht-Reeves bobbins were already clear and aren’t in the photo. I managed to clear all the bobbins on Friday thinking it was the end of October and Spinzilla started today! I have no idea where that week went in my brain, but I’m glad to have that week back! Spinzilla starts a week today.

September sun & a felted bag

I have no idea what is going on with the UK weather, usually September is the start of the weather I love. Autumn is my favourite season, with cooler days and nights and the start of a few rainy days and of course all the Autumn colours. (Autumn = Fall for my US friends)

But it has been unseasonably warm here this week, with the kids back at school without their coats and hats and mittens seeming like a distance concept still. I suppose I shouldn’t complain when the weather man says highs of 29C next week, but to be honest I’d rather it was a bit cooler and I could get on with some DIY with sweating!

So instead I’ve spent this week getting back into the work groove after 6weeks of school holidays off. During this long holidays I keep up with customer emails, Ravelry and knitting on current design ideas, but the actual hard work of designing and teaching gets set aside.

I’ve updated the blog and added some of my patterns to the pages here, which used to be available through my web shop, which is now closed. So I thought it would be helpful to have my designs all in 1 place here. So I’m nearly done with that. 

I’m re working one of my oldest patterns and that will be tech edited and rereleased in the next few weeks. 

Spinning, oh how I love to spin to relax after a busy day at the computer. 


With these 2 bobbins of slightly slubby chunky merino 2ply yarn finished, I settled down to make a felted bag for my Flatiron wheel. I like a bag to store the whorls, oil bottle, spare drive band and brake band and any other bits like WPI gauge. I decided to make this bag slightly bigger as I know I will take this wheel out to events and it would be nice to be able to tuck a spare bobbin in as well. 

For knitting that will be fulled (some just call this felted) I don’t bother finishing the yarn first, I find this makes for firmer felt fabric. So I lazily knitted straight from the bobbins. As soon as the knitting was done I went to the sink to felt it, and once it was wet and soapy, I thought “oh no, you silly woman! You should have taken a photo.” Before felting this bag was very loose and shapeless and obviously much bigger!

My method for felting knitting is as follows; 

Run a bowl of hot as I can get it warmer from the tap and top up from the kettle. I wear thick rubber gloves to prevent scolding myself! Add detergent I find dish washing liquid (aka Fairy Liquid) works well to the hot water. 

Soak the item in the hot water until it’s wetted through, then start felting. 

You can either run a 2nd bowl of cold water and refill it often so it doesn’t get warm, or use the cold tap running.

Aim of the game is to put the hot wet soapy knitting into really cold water, over and over. This is the quickest and least energetic felting process. 

I agitate the item in the hot soapy water, rubbing it between my hands and scrunching it up, then move it quickly to the cold move it around until it’s cold, squeeze the cold water out with my hands and return it to the hot water. Squeezing it out helps stop the hot water going cold and saves having to refresh the hot water. 

Repeat, repeat until it is firm and I’m reasonably happy with the size. This method works well and prevents sections getting stuck together or creases forming which is quite common if you just throw it in the washer. 

I was only at the sink about 15mins. It’s probably quicker if you are really vigorous and use a sink plunger or something, but I’m too laid back for that. 

Rinse all the soap out thoroughly, pull into shape. Then I put mine in the tumble drier as this firms the felt up really well. I put it in until it’s almost dry.

Then stretch over a form of some sort until fully dry. 


Finally a use for all the different shapes and sizes of tuppawear I own!

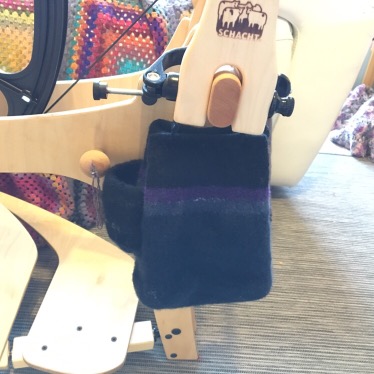
The finished bag hanging on my Schacht Flatiron. 


The bag has a row of eyelets around the top. I added extra twist to a length of the yarn and folded 4 strands and let it twist back on itself, making a cabled yarn. I then threaded this through the eyelets to hang up. It also has a small side pocket for the oil bottle as this is probably the item I use most often from the bag. 

Still loving my Flatiron. 

Schacht sent me these great pin badges, so I will share some with my fellow Schacht wheel owning friends.

The Flatiron

After an excited wait my new Flatiron from Schacht Spindle company arrived this week!

These great new wheels come totally flat packed, hence the reasonably small box for a 22″ saxony wheel. So I cleared the table and set about assembling this modern wheel. Looking at the table of parts might feel a little daunting if you’ve never assembled a wheel before.The team at Schacht have not only created a great product that is precision cut and beautifully finished, which makes the assembly straight forward, they also created this Assembly video which should put you at ease.

Assembly takes about 90mins and all you need is a Phillips head screwdriver and a straight head screwdriver, they have included all the other tools you need.  Only fully tighten things when you are told to and for the nuts and bolts holding the nut still with the spanner and turning the bolt with the screw driver/hex key is easiest.

90mins later and a few drops of oil and we were up and spinning!  She’s sturdy and quiet and nice and fast.

Oh and I didn’t tell the most unique thing about this wheel. You’ll notice the flyer is on the right, rather than on the left like most saxony wheels. Well Schacht came up with a design that means that every Schacht wheel can be set up with the flyer on the left or the right. Change your mind, loan your wheel to a friend, sell your wheel, then you can take it apart and reassemble it with the flyer on the other side. Brilliant!


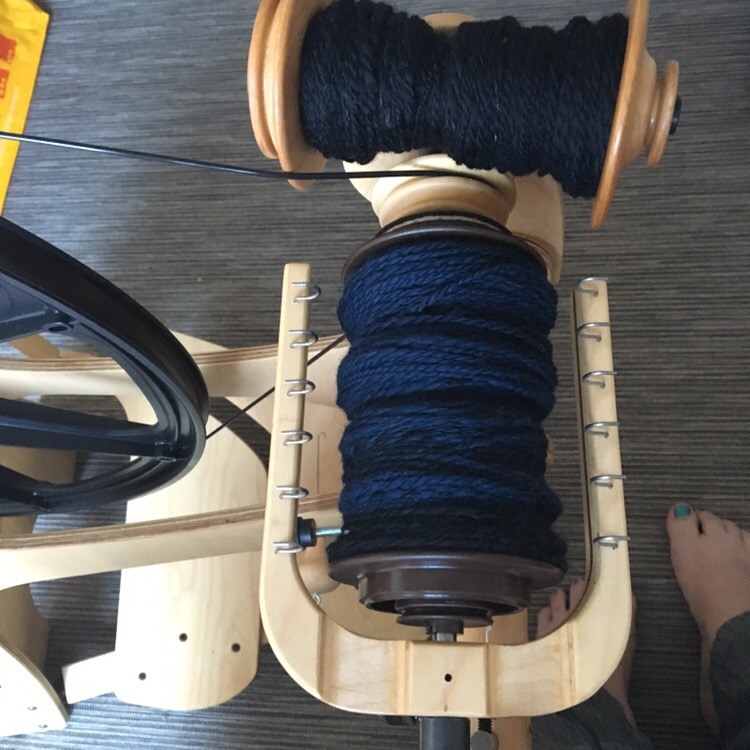
I decided for her first spin I’d spin some oddments of black, navy and purple merino into a thick slightly textured yarn to knit into a little fulled bag to hang from my Flatiron with the oil bottle and spare whorls etc in.


At the moment I’m knitting a cardigan in natural grey Falkland 4ply yarn that I was given for my birthday. More on that next time.

Schacht Wheel Reviews Coming Soon

I am working on reviews for the Schacht Spinning Wheels, and perhaps a comparison chart to help people to choose which one is right for them.
I think I’ve now owned all 4 wheels, the Matchless, Ladybug, Sidekick and 30″ Schacht-Reeves Saxony wheel, long enough to be able to provide you with detailed and helpful information.

If there is anything specific or unusual you would like me to cover let me know in the comments.

I have no association with Schacht and am not a Schacht dealer, just a happy customer spreading the love for beautiful, carefully crafted wheels.

Schacht Ladybug Tutorial: Adjusting the flyer

How to adjust the flyer to reduce noise.

After a few months of using my Ladybug Spinning Wheel I found that it had started to make a ‘chattering’ noise as I spun.   This tutorial describes an adjustment that can be made to reduce this noise.  If you are in any doubt about something related to your Schacht wheel I recommend you contact your Schacht dealer, or Schacht directly for support.

There are many things that can cause your spinning wheel to make unexpected noises while spinning, this tutorial is for noise caused by the flyer moving backwards and forwards between the Maidens only.

Before trying this I suggest you remove your flyer, clean off all oil and grease, re oil as the Schacht Ladybug Manual instructs and try applying some white grease to reduce any noise caused by the bobbin.

Will this help me?

With your flyer assembly in place and the Front Maiden pushed back as far as it allows and the Front Maiden Knob tightened.  Using your hand try to move the Flyer backwards and forwards.

If the flyer moves more than a few mms you may have a reduction in noise by adjusting the Front Maiden.  If there is little or no movement this tutorial will probably not help and you should look for other causes of unexpected noise.

You will need:

  • Schacht Ladybug Spinning wheel with Flyer
  • Small Screw Driver

Have a look at the Ladybug Labeled Parts diagram on the Schacht Website to familiarise yourself with the part names.

Ladybug Maiden fig1
Ladybug Maiden fig1

Loosen the Front Maiden Knob and remove the Flyer. (fig1)

Ladybug Maiden fig2
Ladybug Maiden fig2

Unscrew the Front Maiden Knob Fully and remove it. Remove the Front Maiden from the Ladybug. (fig2)

Be careful not to loose the Front Maiden Knob and its white washer or the Front Maiden Glide Stop (fig2) or the Barrel Nut (fig5).

Ladybug Maiden fig3
Ladybug Maiden fig3

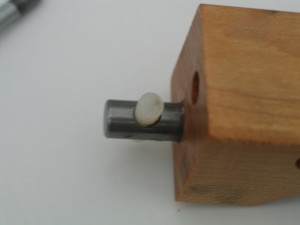
Locate the screw driver slot on the Front Maiden Glide Stop.  (fig3)

This is the part which stops you being able to move the Front Maiden back too far.  It is an important part of your spinning wheel, enabling you to glide the Front Maiden to the correct position every time without worrying it is too tight against the flyer.

Ladybug Maiden fig4
Ladybug Maiden fig4

Use the Screw Driver to turn the white threaded piece of Front Maiden Glide Stop. (fig4) You only need to turn the screw driver a small amount, approximately 1/4 turn.

If the Glide Stop is orientated the same way (as in fig4), with the screw slot towards the front  of the wheel (this is the flat part of the Maiden, the part closest to the flyer is curved). Turning the screw anti clockwise will allow the Maiden to move further back reducing the amount of flyer movement.   Only make tiny changes before trying the flyer again to check the movement.

After making a small adjustment place the Front Maiden and Flyer back on the wheel and check the movement in the Flyer while holding the Front Maiden as far back as the Glide Stop allows.

You can now replace the Front Maiden and the Front Maiden Knob to secure it. Ensure that you fit the Front Maiden facing the right way (as in fig1). When the Front Maiden is slid back as far as the Glide Stop allows the flyer should only move forwards and backwards the smallest amount.

However you do NOT want the Glide position of the Front Maiden too far back otherwise it will cause too much friction on the flyer, making treadling harder and may cause unnecessary wear. As well as making it harder to get the Front Maiden in the correct position. If it is too tight, remove the Maiden and re-adjust the Glide Stop (clockwise to give the flyer a little more space).

Ladybug Maiden fig5
Ladybug Maiden fig5

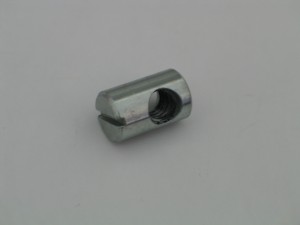
While doing this you may find a metal component falls out (Barrel Nut) (fig5).  This nut goes inside the Front Maiden and the Front Maiden Knob is secured into it.

Ladybug Maiden fig6
Ladybug Maiden fig6

If the Barrel Nut falls out, or you have difficulty screwing the Front Maiden Knob back in,  Push the Barrel Nut into the hole in the side of the Front Maiden (fig6). You may need to use a Screw Driver to align the Nut with the slot upright and in the centre of the Maiden, to enable the Front Maiden Knob to screw in.

Schacht Ladybug Glide Stop + Barrel Nut

If the Front Maiden Glide Stop falls out it can be held in place with a small amount of white grease.  Some spinners have reported finding this part has fallen out of their wheel during changes in temperature etc, if this happens slot it back in (as in fig4) and hold with white grease if necessary.  There is some information about this on the Schacht Website here.

I hope you find this information useful, but if you are in any doubt I recommend you contact local Schacht dealer or Schacht for support.