Spinning for a project – Use of colour

I am quite keen on making the most of both the time I spend spinning and the fibre I use, to that end I spin most of my yarns with a project in mind.
Hand dyed spinning fibre is a big temptation, but so many spinners are disappointed with how their yarns knit up. Due to; muddied colours, barber pole effects, length of colour repeats, strong striping, dye lot changes, etc. The list is endless.
So I thought I would write some blog posts addressing these issues.

The first issue I thought I would address is the effect on the length of colour stripes when the width of the knitting fabric changes.
Eg. You spin some beautiful yarn from hand dyed top or graduated batts, and proceed to knit a triangular shawl which starts with a few stitches per row and increases to several hundred per row.
The closer you get to the edge the thinner the bands of colour become, to the extent that the edge doesn’t even have stripes.
The effect may be pleasing, or it might not.

To keep the bands of colour more equal make a simple change to the way you prepare your fibre before you start spinning.

Here is an example:
I have 100grams of hand painted top which has repeats of colour along its length and 100grams of hand dyed top which has very little variation in colour.
I plan to spin both lots of fibre and ply them together to form a 2ply.
I then want to use it to knit a large circular shawl, If I work from the top as I received it, without any splitting the resulting shawl with have a large circular of colour in the middle with the bands of colour getting smaller and smaller towards the edge and even mottled at the far edge.
If I want the bands of colour to have a similar width across the diameter of shawl I can strategicly divide the fibre before I start spinning.
For this example I will just divide the fibre for 1 ply and leave the second more solid fibre as is.

Undivided Top
fig1: Undivided Top

I split the fibre in half length ways as my fibre is a silk brick which is much wider than regular top, so for regular top skip this step or your fibre may be too thin to split further.

Split in half lengthwise
fig2: Split in half lengthwise
fig2 diagram
fig2 diagram

Next comes the strategic dividing of fibre. I broke the top into 5 fairly equal pieces, you can do this based on the colour repeats in your fibre for best results.
The first piece is not split at all (1). The next piece is split in half lengthways to make 2 thinner strips (1/2). The next piece is split into 3 lengthwise for even thinner strips (1/3). The next piece is split into 4 lengthwise (1/4). The last piece is split into 6 lengthwise (1/6) (I can’t manage to get 5 equal strips so I do 6, I do this by spliting in half, then spliting each into 3.) You can see in the photo the piles of fibre getting thinner from left to right.
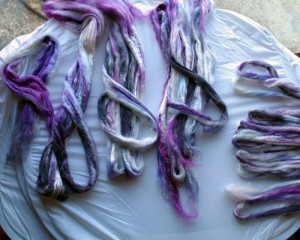
fig3: Strategic dividing

fig3 diagram
fig3 diagram

I then crochet chain the strips of top in order so that they don’t get mixed up before spinning, if you want the colours to follow in sequence make sure you take note of the ‘start end’ and the ‘end end’.
You can see in this picture that the chain goes from fat, to thin and then thinner, the thinnest I rolled into a ball as it would be messy to chain.

fig4: final chained top

When you have spun and plied your yarn you want to use the end with the short colour changes at the small part of your shawl (centre for round shawls) and the slow colour change end will be for the longer edge of your shawl.
For this fibre I will straight 2 ply with the 2nd solid ply, but you could navajo ply for great colour alignment. Or if you are really confident in your dividing skills divide in the same way for both plies for a matched 2ply.
I’ll update this post with a photo of the shawl when its finished.

Triangular Shawl Calculator

Here’s a little way to calculate the maximum number of rows you can work on a shawl (top down shawls only). You need to have knitted at least 20% of your yarn to do get an accurate answer, though it will return a result with more than 10% yarn used.

Triangular shawl
This calculation will work for any shawl pattern that starts at the top and has a consistent number of increases in each row. (ie. 4 increases on every right side row and 2 sts on every wrong side row, or 4increases every other row.)
(Examples of this type of shawl are: ‘Swallowtail’, ‘Ishbel’, ‘Aeolian’, ‘Kiri’, ‘Traveling Woman’, My ‘Dew Drops’ & ‘Danish Ripple’ Shawls)
(I know these shawls have slightly different shapes, but trust me the maths works for all of them.)

You need to know:

Number of Constant stitches in each row: (eg. Swallowtail: 5, Ishbel: 7, Aeolian: 5 or 7.) (usually edge stitches on each side + centre stitch) (If you don’t know this don’t worry too much as it doesn’t make a huge difference to the result.)

Total yarn weight: (This is how much yarn you have available for the project, in grams is best.)

Used yarn weight so far: (This is the total weight of yarn minus what you have left un-knitted.)

Rows worked so far: (with many shawl you can count the number of holes running up the middle next to the centre st and x2).

RESULT
Maximum Number of Rows:

This result is the number of rows you can work with the yarn you have available, it allows you 3rows worth of yarn to cast off which is sufficient for a very stretchy bind off.
If you pattern has a lot of increases in the final few rows, ie lots of yarn over’s for a pointier edge you will need to subtract a few more rows to allow for that.
If your pattern tells you to cast off with the yarn held double you will need to subtract a few more rows to allow for this.

This calculator requires javascript to be enabled.
I hope you find this page useful, I provide it free for everyone, please link to it here.
Contact me through Raverly, or email me if you have any questions.
P.s. Please don’t blame me if the answer doesn’t work out for you, I provide this script working to the best of my knowledge, free to everyone.
(c) Bex Hopkins 2010, please do not attempt to steal this script.
If you would like to know how this is calculated please contact me.

Building a Tri-Loom

I decided to build a Tri-Loom, after seeing Thiftwizard’s Tri-loom when I visited her house for a spin-In.
I haven’t found any where in the UK that sells them, and to be honest its no great feat of engineering to make one.

I went to B&Q to look for suitable wood, they don’t sell Hard woods, but did have some fairly hard smooth planed wood. I bought a pack of 4, 2.1m x 44mm x 34mm.
The resulting loom is 2m on the inside edge of the long side. Which should make a nice sized shawl for someone my height.
For those who have no idea what I am going on about, have a look at some building instructions here.  I also took some inspiration from this blog.

I chose to set my nails on the hypotenuse (longest side) at 1cm (3/8inch), giving me 2oo on each side.  I figured that 1/2inch that everywhere seems to recommend would give me too loose a weave for the yarns I am likely to use.

Spinning Journal

I have been keeping a spinning journal for a while, and I consider selling these hand bound spinning journals in my shop, but that’s now unlikely to happen, as I don’t think their potential sale price covers my time to make them.

So I’m going to write a tutorial to share what I have learnt in the process of making mine, and what I finally came up with.

To start with, here is the pdf of my page template. Its an A4 template, the pages are folded in half for hand binding, giving an A5 journal.

Spinning Journal Template

Old Ashford Elizabeth

I am now the proud owner of an old Ashford Elizabeth.  These wheels are the same design as the newer Elizabeth II, but has a smaller 22″ fly wheel instead of the 24″.

I bought it second hand on Ebay, and it arrived very quickly. Turns out it was being sold through The Threshing Barn, customer service was great and the item well packed despite being a very difficult item to pack and ship.

She came with 3 bobbins (2 old, 1 new), original lazy kate and a new threading hook and drive band.  She has recently had new bushes for the bobbins and new front and rear bearings.

Schacht Ladybug Tutorial: Adjusting the flyer

How to adjust the flyer to reduce noise.

After a few months of using my Ladybug Spinning Wheel I found that it had started to make a ‘chattering’ noise as I spun.   This tutorial describes an adjustment that can be made to reduce this noise.  If you are in any doubt about something related to your Schacht wheel I recommend you contact your Schacht dealer, or Schacht directly for support.

There are many things that can cause your spinning wheel to make unexpected noises while spinning, this tutorial is for noise caused by the flyer moving backwards and forwards between the Maidens only.

Before trying this I suggest you remove your flyer, clean off all oil and grease, re oil as the Schacht Ladybug Manual instructs and try applying some white grease to reduce any noise caused by the bobbin.

Will this help me?

With your flyer assembly in place and the Front Maiden pushed back as far as it allows and the Front Maiden Knob tightened.  Using your hand try to move the Flyer backwards and forwards.

If the flyer moves more than a few mms you may have a reduction in noise by adjusting the Front Maiden.  If there is little or no movement this tutorial will probably not help and you should look for other causes of unexpected noise.

You will need:

  • Schacht Ladybug Spinning wheel with Flyer
  • Small Screw Driver

Have a look at the Ladybug Labeled Parts diagram on the Schacht Website to familiarise yourself with the part names.

Ladybug Maiden fig1
Ladybug Maiden fig1

Loosen the Front Maiden Knob and remove the Flyer. (fig1)

Ladybug Maiden fig2
Ladybug Maiden fig2

Unscrew the Front Maiden Knob Fully and remove it. Remove the Front Maiden from the Ladybug. (fig2)

Be careful not to loose the Front Maiden Knob and its white washer or the Front Maiden Glide Stop (fig2) or the Barrel Nut (fig5).

Ladybug Maiden fig3
Ladybug Maiden fig3

Locate the screw driver slot on the Front Maiden Glide Stop.  (fig3)

This is the part which stops you being able to move the Front Maiden back too far.  It is an important part of your spinning wheel, enabling you to glide the Front Maiden to the correct position every time without worrying it is too tight against the flyer.

Ladybug Maiden fig4
Ladybug Maiden fig4

Use the Screw Driver to turn the white threaded piece of Front Maiden Glide Stop. (fig4) You only need to turn the screw driver a small amount, approximately 1/4 turn.

If the Glide Stop is orientated the same way (as in fig4), with the screw slot towards the front  of the wheel (this is the flat part of the Maiden, the part closest to the flyer is curved). Turning the screw anti clockwise will allow the Maiden to move further back reducing the amount of flyer movement.   Only make tiny changes before trying the flyer again to check the movement.

After making a small adjustment place the Front Maiden and Flyer back on the wheel and check the movement in the Flyer while holding the Front Maiden as far back as the Glide Stop allows.

You can now replace the Front Maiden and the Front Maiden Knob to secure it. Ensure that you fit the Front Maiden facing the right way (as in fig1). When the Front Maiden is slid back as far as the Glide Stop allows the flyer should only move forwards and backwards the smallest amount.

However you do NOT want the Glide position of the Front Maiden too far back otherwise it will cause too much friction on the flyer, making treadling harder and may cause unnecessary wear. As well as making it harder to get the Front Maiden in the correct position. If it is too tight, remove the Maiden and re-adjust the Glide Stop (clockwise to give the flyer a little more space).

Ladybug Maiden fig5
Ladybug Maiden fig5

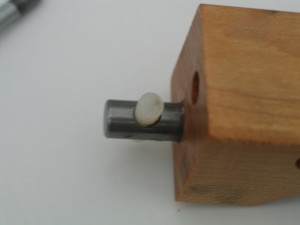
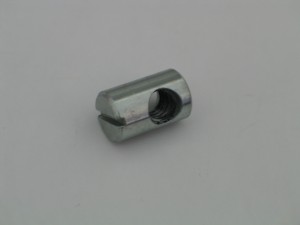
While doing this you may find a metal component falls out (Barrel Nut) (fig5).  This nut goes inside the Front Maiden and the Front Maiden Knob is secured into it.

Ladybug Maiden fig6
Ladybug Maiden fig6

If the Barrel Nut falls out, or you have difficulty screwing the Front Maiden Knob back in,  Push the Barrel Nut into the hole in the side of the Front Maiden (fig6). You may need to use a Screw Driver to align the Nut with the slot upright and in the centre of the Maiden, to enable the Front Maiden Knob to screw in.

Schacht Ladybug Glide Stop + Barrel Nut

If the Front Maiden Glide Stop falls out it can be held in place with a small amount of white grease.  Some spinners have reported finding this part has fallen out of their wheel during changes in temperature etc, if this happens slot it back in (as in fig4) and hold with white grease if necessary.  There is some information about this on the Schacht Website here.

I hope you find this information useful, but if you are in any doubt I recommend you contact local Schacht dealer or Schacht for support.

Baby Surprise Trousers

I decided that for the Baby Surprise Jacket by EZ to be the perfect baby gift, it needed something to go with it, so I searched ravelry and didn’t really find anything with the same mitred styling.

So I am going to design and knit some Baby Surprise Trousers, with the same mitred styling and knitted in 1 piece!  I have the pattern in my head and I think it works, but I need to cast on and knit through any problems, before giving any more details.

I’m very excited about this!

Baby Surprise Jacket by Elizabeth Zimmermann

I recently bought the book ‘The Opinionated Knitter’ by Elizabeth Zimmermann.

For those of you who knit who haven’t heard of EZ, go look her up, she produced some amazing patterns, written in a very simple style, she is no longer alive, but her patterns are still very popular.

The Baby Surprise Jacket is particually popular and is of a very interesting construction.  (On Ravelry)

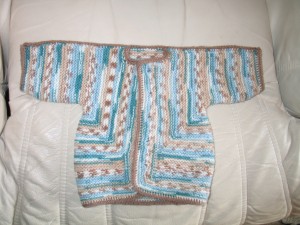
So today I have started knitting my first one, from the ‘notes’ in her book.  Its very interesting as it is knitting in 1 peice, but not in the round, the only seams are on the top of the arms (none on the under side of the arms or on the body.

I used the 3 needle i-cord cast off for the shoulder seams, and a i-cord edging for the rest.

First Baby Surprise Jacket

Handspun Swallowtail Shawl

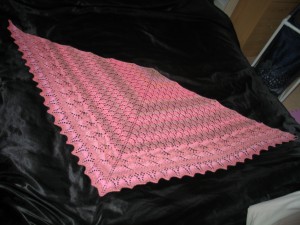
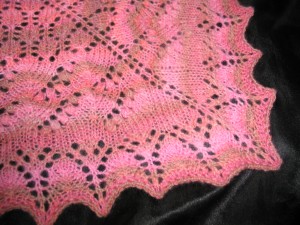
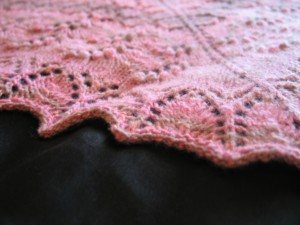
From 200grams of Organic Merino ‘Tea and Roses’ Club fibre to 600m of handspun yarn to 4ft6 Swallowtail shawl.

2ply yarn, spun worsted on my Ladybug, final yarn between 4ply and sport weight.

I only got my first wheel in January this year, and I managed to spin, ply, knit and block this shawl in just 13days, as part of my Tour de Fleece spinning challenge.

Pictures 🙂

IMG_2603

IMG_2557

IMG_2595

IMG_2611

IMG_2612

IMG_2613

IMG_2616

Easy Baby Blanket

I recently knitted an Easy Baby Blanket for a friend who was having a baby. (He was born big and healthy last weekend and both mum and baby are doing well.)

Easy Baby Blanket
Easy Baby Blanket

The pattern is available on the BBC website here.  (On Ravelry here.)
It is a pattern is for a blanket, knitted as a a square starting at the corner, when finished you then knit a lace edging and sew it on.

I used 200grams off DK weight yarn, a full edging all the way around takes about 20% of the yarn.

I am adverse to sewing anything when doing a knitting project, so I made some changes, to enable me to knit the edging on, making for a neater, seamless blanket.

I used a different increase method, a slip stitch edge, knitted the border on with No sewing!

As Follows…

For increases:
Every Row:
Slip 1 purlwise, K into Front and Back of stitch, Knit to last stitch, Knit through back of loop.

For decreases:
Every Row:
Slip 1 purlwise, Slip 1 Knit 1, Pass Slipped stitch over, Knit to last stitch, Knit through back of loop.

This forms 1 stitch on the edge of the blanket for every 2 rows, perfect for attaching the border.

For knitting on the edging, start on a corner, knit the last stitch on the even rows together with 1 slip stitch from the blanket edge.
This will align the edging on the blanket perfectly, without having to measure how much edging is needed and sew it on.

Edging worked as follows:
Cast on 8 stitches
Row 1 ( Wrong side) Slip 1, Knit 1,(Yarn fwd knit 2 tog)twice, Yarn fwd Knit 2 (9sts)
Rows 2, 4, and 6. Slip 1, Knit to last stitch, K last st together with 1 slip stitch from blanket edge.
Row 3. Slip 1, knit 2 (yarn fwd knit 2 tog) twice. Yarn fwd Knit 2 (10sts)
Row 5. Slip 1, knit 3 (yarn fwd knit 2 tog) twice. Yarn fwd Knit 2 (11sts)
Row 7. Slip 1, knit 4 (yarn fwd knit 2 tog)twice . Yarn fwd Knit 2 (12sts)
Row 8. Slip 1, Knit 10 sts, K last st together with 1 slip stitch from blanket edge.
Row 9. Slip 1 Knit 11 sts Row 10 cast off 4 Sts Knit to the end ( 8sts)
These 10 rows form the pattern.

I hope these changes will help anyone who wants to knit this pattern.

Fractal Spinning

I’ve been playing with fractal spinning the last few days.
This is a draft tutorial and needs more information and images.
What is fractal spinning?
Well it is method of spinning, it works best with tops which have been painted with stripes (there are alternatives, but I will ignore them here for simplicity).
The principal is to create a yarn where the plies have different lengths of colour repeat.  This is achieved by dividing the top lengthways.
This method shows how to create a 2ply yarn, though the theory can be applied for 3plies.
It works best with tops that have a regular colour repeat, 3 colours works well.  This example has only 2 colours.
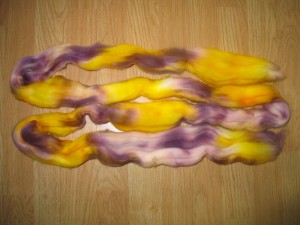
Starting off with 1 length of continuous top (this  is Superwash Merino from ColourflDesigns.com), we want to spin all the tops in the same direction, so we need to make a note of the end.  I will be spinning from the end with the longer yellow stripe (top of  photo).
Fractal Step 1
Fractal Step 1 - Undivided Top

Split the top along its length being carefuly to keep both peices equally, providing you with 2 lengths of top that are half the width of the original.

You now have 2 lengths of top that are thinner, remember the end to spin from (bottom left of both peices in this picture).

Fractal Step 2
Fractal Step 2 - First Divide

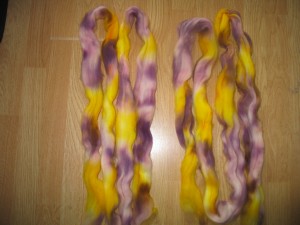
1 of these will become the first ply for your yarn.  The 2nd needs to be split again length ways, making 2 equal thinner strips.  Remember which end you are spinning from.  In the image below: Left; Top for first ply (spinning end is bottom left),  Right; Top for second ply, 2 thinner lengths (spinning end is bottom length of both peices).

Fractal Step 3
Fractal Step 3 - Final Divide

You may want to roll these into a ball, or pre draft by attenuating them if you wish, but this may cause the colours to blend together, disrupting the striping.

When you spin each of the plies, the first ply will have long colour repeats, (in the image above the 1st ply will have 9  long colours repeats of yellow, purple), the 2nd ply will have shorter colour repeats (in the image above the 2nd ply will have 18 shorter colour repeats of yellow, purple).

Making sure you spin the tops from the right end will meake sure you get matching colour repeats aong the length, and when you ply you should ply from the same end of each single.

The effect will be a yarn with slow colour changes over laid with faster colour changes, making a really interesting colour blend effect.  Where both plies are the same colour you will get a solid section, but other sections will be blended.  If you are using more than 1 length of top for a larger garment follow the same steps and identify the same starting end if possible (this is easier when 3 or more colours are present).

I will post more pictures of the finished yarn and a knitted item when its finished.  It works well for socks!

Dyeing day

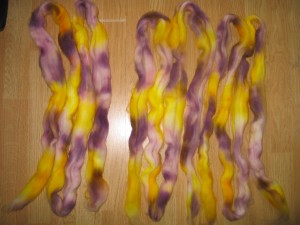
I did some dyeing today, here are some pictures. I’m going to use the Pansy colourway to try some fractal spinning.

IMG_2534
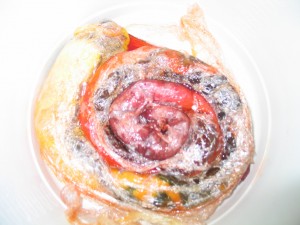
Superwash Merino, still wrapped in clingfilm sausage after dying in Moss colours.
Spiral dying
Shetland and BFL humbug next to each, spiral dyed Red -> Yellow, still wrapped in clingfilm.
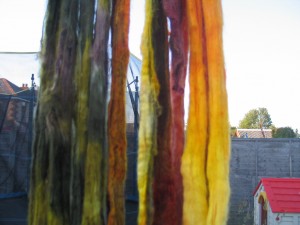
Moss + Spiral Fire
The moss and Spiral dyed fibre hanging up to dye.
Pansy Superwash Merino
Superwash Merino in Pansy colourway. I ran out of blue dye (and thus Purple) so the second lot is paler purple.

For those of you who may be interested this is where I do my dyeing.

Workspace

Workspace